WordPress如何添加说说/心情/公告页面

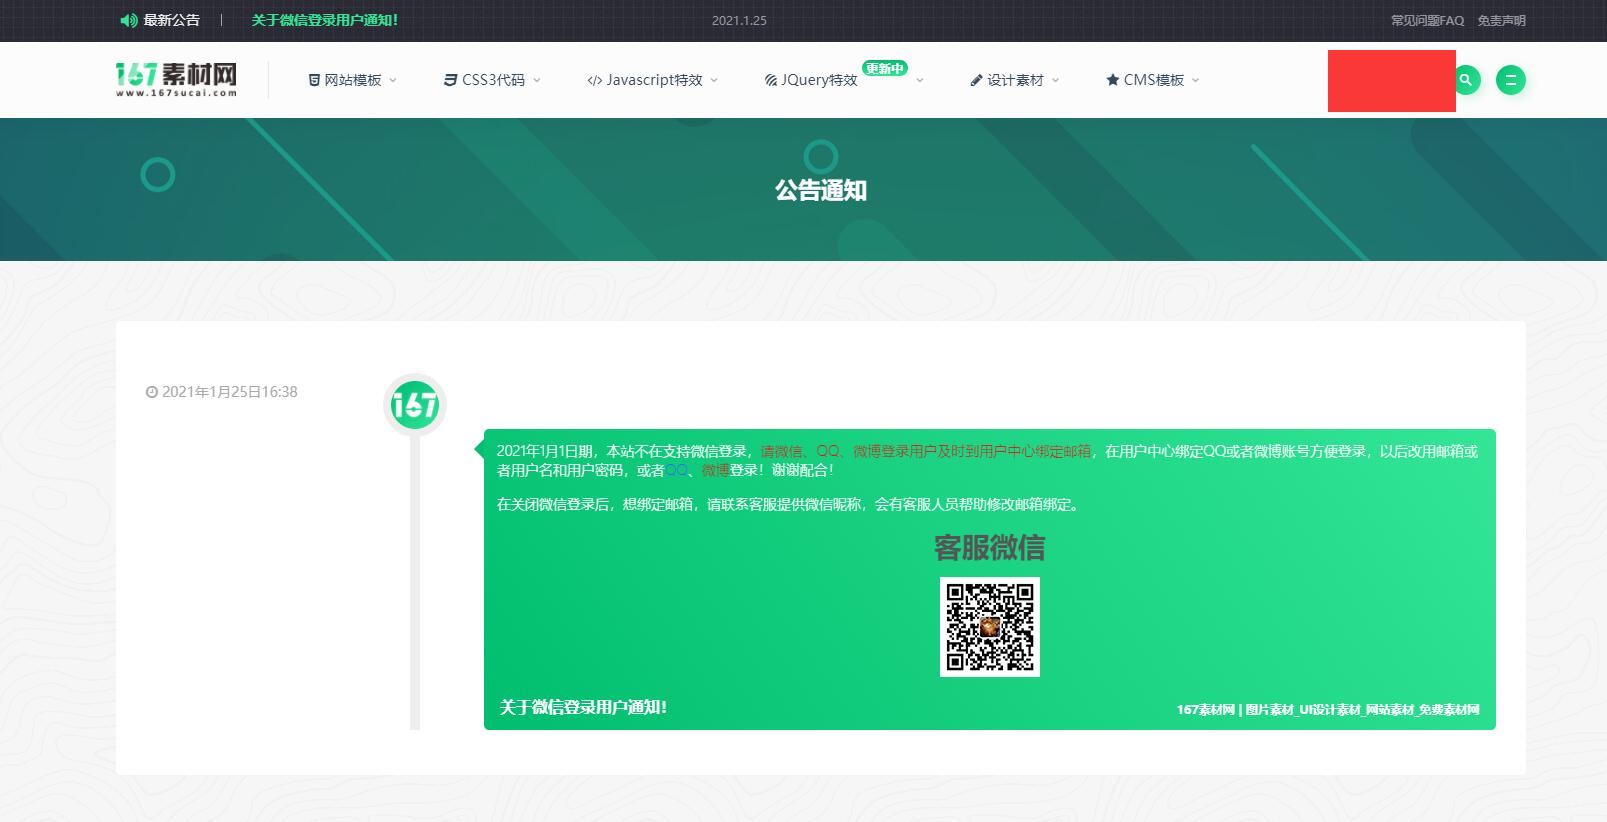
前台示例
注册帖子类型
首先,我们需要使用 WordPress 的 register_post_type( ) 函数注册一个新的帖子类型,以方便日后编辑说说。将以下代码直接丢到主题的 functions.php 文件中去即可。
function my_custom_shuoshuo_init() {
    $labels = array(
        'name' => '说说',
        'singular_name' => '说说',
        'all_items' => '所有说说',
        'add_new' => '发表说说',
        'add_new_item' => '撰写新说说',
        'edit_item' => '编辑说说',
        'new_item' => '新说说',
        'view_item' => '查看说说',
        'search_items' => '搜索说说',
        'not_found' => '暂无说说',
        'not_found_in_trash' => '没有已遗弃的说说',
        'parent_item_colon' => '',
        'menu_name' => '说说'
    );
    $args = array(
        'labels' => $labels,
        'public' => true,
        'publicly_queryable' => true,
        'show_ui' => true,
        'show_in_menu' => true,
        'query_var' => true,
        'rewrite' => true,
        'capability_type' => 'post',
        'has_archive' => true,
        'hierarchical' => false,
        'menu_position' => null,
        'supports' => array('title','editor','author')
    );
register_post_type('shuoshuo',$args);
}
关于 register_post_type( ) 函数的使用,你可以查阅这篇文章:
https://developer.wordpress.org/reference/functions/register_post_type/
添加说说/心情页面模板文件
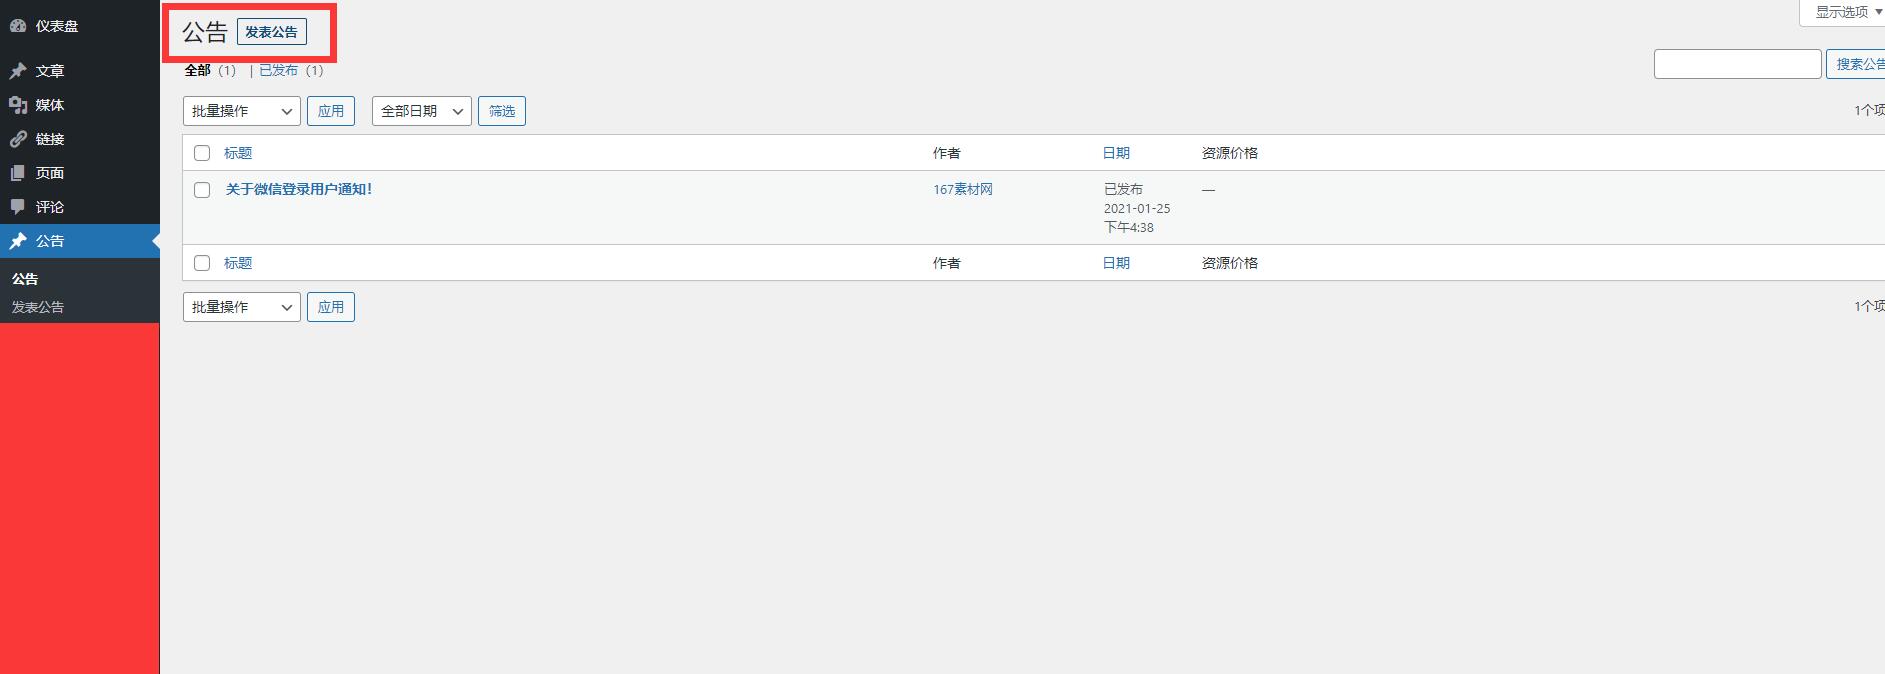
添加完上述函数后,我们就可以在后台发现一个“说说”的菜单,通过菜单即可编辑说说,但是我们发现编辑完成后的说说并不能在前端显示出来,这是我们们需要新建一个说说的页面模板控制其前端显示,将以下代码复制并另存为 page_shuoshuo.php ,并上传至主题根目录下。
<?php
/* Template Name: 说说/心情 */
get_header();
?>
<link rel="stylesheet" type="text/css" href="<?php echo get_template_directory_uri(); ?>/css/vertical_timeline.css" />
<section class="container">
<div class="content-wrap">
<div class="content">
    <div style="background: #FFF; padding: 30px; border-radius: 5px;">
        <ul class="cbp_tmtimeline">
        <?php
        query_posts("post_type=shuoshuo & post_status=publish & posts_per_page=-1");
        if ( have_posts() ) {
        while ( have_posts() ) {
        the_post(); ?>
            <li>
                <time class="cbp_tmtime"><i class="fa fa-clock-o"></i> <?php the_time('Y年n月j日G:i'); ?></time>
                <div class="cbp_tmicon">
                <img src="//logo.png" class="avatar avatar-48"  >
                </div>
                <div class="cbp_tmlabel" >
                    <span style="font-size:14px;"><?php the_content(); ?></span>
                    <h2><?php the_title(); ?><span><?php echo get_bloginfo('name'); ?> | <?php echo get_bloginfo('description' ); ?></span></h2>
                </div>
            </li>
        <?php }
        } ?>
        </ul>
    </div>
</div>
</div>
<?php get_sidebar(); ?>
</section>
<?php get_footer();?>
代码中所用 WordPress 函数官方文档如下:
- have_posts(); :https://developer.wordpress.org/reference/functions/have_posts/
- query_posts(); :https://developer.wordpress.org/reference/functions/query_posts/
- the_post(); :https://developer.wordpress.org/reference/functions/the_post/
- the_time(); :https://developer.wordpress.org/reference/functions/the_time/
- the_content(); :https://developer.wordpress.org/reference/functions/the_content/
- the_title(); :https://developer.wordpress.org/reference/functions/the_title/
- get_bloginfo(); :https://developer.wordpress.org/reference/functions/get_bloginfo/
CSS样式美化
将以下代码复制并保存为 vertical_timeline.css 文件,直接丢到主题 css 文件夹下即可。
/** 垂直时间线CSS样式 */

.cbp_tmtimeline {
    margin: 30px 0 0 0;
    padding: 0;
    list-style: none;
    position: relative;
}
/* The line */
.cbp_tmtimeline:before {
    content: '';
    position: absolute;
    top: 0;
    bottom: 0;
    width: 10px;
    background: #afdcf8;
    left: 20%;
    margin-left: -6px;
}
/* The date/time */
.cbp_tmtimeline > li .cbp_tmtime {
    display: block;
    width: 30%;
    padding-right: 100px;
    position: absolute;
    color: #AAA;
}
.cbp_tmtimeline > li .cbp_tmtime span {
    display: block;
    text-align: right;
}
.cbp_tmtimeline > li .cbp_tmtime span:first-child {
    font-size: 0.9em;
    color: #bdd0db;
}
.cbp_tmtimeline > li .cbp_tmtime span:last-child {
    font-size: 2.9em;
    color: #24a0f0;
}
.cbp_tmtimeline > li:nth-child(odd) .cbp_tmtime span:last-child {
    color: #7878f0;
}
/* Right content */
.cbp_tmtimeline > li .cbp_tmlabel {
    margin: 0 0 15px 25%;
    background: #24a0f0;
    color: #fff;
    padding: 0.8em;
    font-size: 1.2em;
    font-weight: 300;
    line-height: 1.4;
    position: relative;
    border-radius: 5px;
}
.cbp_tmtimeline > li:nth-child(odd) .cbp_tmlabel {
    background: #7878f0;
}
.cbp_tmtimeline > li .cbp_tmlabel h2 {
    border-bottom: 0px;
    border-top:1px dashed #FFF;
    font-size:16px;
    height: 24px;
    padding: 5px 3px 12px;
    margin:0px;
}
.cbp_tmtimeline > li .cbp_tmlabel h2 > span {
    font-size: 12px;
    float: right;
    text-align: center;
    line-height: 24px;
    overflow: hidden;
    text-overflow: ellipsis;
    white-space: nowrap;
}
/* The triangle */
.cbp_tmtimeline > li .cbp_tmlabel:after {
    right: 100%;
    border: solid transparent;
    content: " ";
    height: 0;
    width: 0;
    position: absolute;
    pointer-events: none;
    border-right-color: #24a0f0;
    border-width: 10px;
    top: 10px;
}
.cbp_tmtimeline > li:nth-child(odd) .cbp_tmlabel:after {
    border-right-color: #7878f0;
}
/* The icons */
.cbp_tmtimeline > li .cbp_tmicon {
    width: 48px;
    height: 48px;
    font-family: 'ecoico';
    speak: none;
    font-style: normal;
    font-weight: normal;
    font-variant: normal;
    text-transform: none;
    font-size: 48px;
    line-height: 48px;
    -webkit-font-smoothing: antialiased;
    position: relative;
    color: #fff;
    background: #46a4da;
    border-radius: 50%;
    box-shadow: 0 0 0 8px #afdcf8;
    text-align: center;
    left: 20%;
    top: 0;
    margin: 0 0 0 -25px;
}
.cbp_tmtimeline > li .cbp_tmicon >img {
    border-radius: 50%;
    position: absolute;
    top: 0px;
    left: 0px;
}
/* Example Media Queries */
@media screen and (max-width: 65.375em) {
    .cbp_tmtimeline > li .cbp_tmtime span:last-child {
        font-size: 1.5em;
    }
}
@media screen and (max-width: 47.2em) {
    .cbp_tmtimeline:before {
        display: none;
    }
    .cbp_tmtimeline > li .cbp_tmtime {
        width: 100%;
        position: relative;
        padding: 0 0 20px 0;
    }
    .cbp_tmtimeline > li .cbp_tmtime span {
        text-align: left;
    }
    .cbp_tmtimeline > li .cbp_tmlabel {
        margin: 0 0 30px 0;
        padding: 1em;
        font-weight: 400;
        font-size: 95%;
    }
    .cbp_tmtimeline > li .cbp_tmlabel:after {
        right: auto;
        left: 20px;
        border-right-color: transparent;
        border-bottom-color: #24a0f0;
        top: -20px;
    }
    .cbp_tmtimeline > li:nth-child(odd) .cbp_tmlabel:after {
        border-right-color: transparent;
        border-bottom-color: #7878f0;
    }
    .cbp_tmtimeline > li .cbp_tmicon {
        position: relative;
        float: right;
        left: auto;
        margin: -55px 5px 0 0px;
    }
}
样式代码来源于 jQuery 插件库的垂直时间轴,不过我稍微做了些修改。
新建说说页面
代码部署完成后前往后台新建一个页面,页面模板选择“说说/心情”即可。
现在你就可以通过访问页面链接来查看发布的说说了。
声明:本站所有文章,如无特殊说明或标注,均为本站原创发布。任何个人或组织,在未征得本站同意时,禁止复制、盗用、采集、发布本站内容到任何网站、书籍等各类媒体平台。如若本站内容侵犯了原著者的合法权益,可联系我们进行处理。


评论(4)
老师您好,按照你的做法成功建立了说说,现在想在每条说说下面增加可以评论回复的功能,尝试了无数办法,只能实现到在说说页面的最下面出现个评论框,而不是在每条说说下面出现。想请老师指点下,最好能够顶一下样式,在说说的每条上点击“回复”弹出对这一条说说的评论框。不胜感谢。
也许你需要的是wordpress朋友圈主题,你可以搜搜看~
那么问题来了,久了之后说说太多了,怎么分页呢,加个上一页下一页
参考一下文章内页增加翻页的文章